目錄
前言
EtherChannel 有很多別名,什麽 Port Channel、Link Aggregation、Teaming,其實全部都指同一種技術,就是把兩個或以上的 Physical Ethernet Port (包括: Ethernet、Fast Ethernet、Gigabit Ethernet、10 Gigabit Ethernet 等等) 合併成一個 Logical Port 去使用。設定方法有三種:分別是 Static (On Mode),PAgP (Port Aggregation Protocol) 和 LACP (Link Aggregation Control Protocol)。其中 PAgP 是 Cisco 專有,只有 Cisco 產品上可以使用。
EtherChannel 的好處
EtherChannel 的好處有兩個:
提高 Bandwidth (頻寬)
假設把 4 個 100Mb Port 組合起來變成 1 個 400Mb Port,頻寬當然提高了!但這只能說是有限度地提高,為什麼這樣說呢?由於把 Port 設定成 EtherChannel 後,當有 Traffic 要通過這條 EtherChannel,Switch 就會用它的方法 (方法可以設定,稍後再說) 去把 Traffic 平均分配 (Load Balance) 到 EtherChannel 內不同的 Port,不過需留意的是,Switch 處理 Load Balance 的方法是 Flow Base 的,即是說同一條 Traffic Flow 是會被放在同一個 Port 送出去。所以,就算 4 個 100 Mb Port 加起來有 400 Mb,可是同一條 Flow 最多仍然只有 100Mb 頻寬。
Redundancy (冗餘)
意思十分簡單,如 2 個 Port 組合在一起成為 EtherChannel,就算死掉 1個,雖然頻寬下降了但仍能維持有限度服務,同一時間斷掉 2個的話就要怪自己人品不好了,然而你也可以選擇把最多 8 個 Port 組合成 1 個 EtherChannel 去彌補人品的問題。
Static On Mode
設定 EtherChannel 最簡單的方法就是用 Static On Mode,硬性把 Port 放進同一個 Group。習慣上我們會在 Network Diagram 把屬於同一 Group 的 Port 圈起來表示,如下圖:
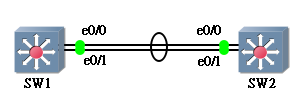
在設定前可先看一下 show spanning-tree。由於 SW1 是 Root Switch,SW2 選擇把 Et0/1 設定 Blocking State 去避免 Loop,於是這條 Link 的 Bandwidth 就浪費了。(不熟悉 Spanning Tree 的讀者可以到以下這篇看看:Spanning Tree Protocol (STP) )
SW1#show spanning-tree

 VLAN0001
   Spanning tree enabled protocol ieee
   Root ID    Priority    32769
              Address     aabb.cc00.0100
              This bridge is the root
              Hello Time   2 sec  Max Age 20 sec  Forward Delay 15 sec

   Bridge ID  Priority    32769  (priority 32768 sys-id-ext 1)
              Address     aabb.cc00.0100
              Hello Time   2 sec  Max Age 20 sec  Forward Delay 15 sec
              Aging Time 15

 Interface           Role Sts Cost      Prio.Nbr Type
 ------------------- ---- --- --------- -------- --------------------------------
 Et0/0               Desg FWD 100       128.1    Shr
 Et0/1               Desg FWD 100       128.2    Shr
SW2#show spanning-tree

 VLAN0001
   Spanning tree enabled protocol ieee
   Root ID    Priority    32769
              Address     aabb.cc00.0100
              Cost        100
              Port        1 (Ethernet0/0)
              Hello Time   2 sec  Max Age 20 sec  Forward Delay 15 sec

   Bridge ID  Priority    32769  (priority 32768 sys-id-ext 1)
              Address     aabb.cc00.0200
              Hello Time   2 sec  Max Age 20 sec  Forward Delay 15 sec
              Aging Time 15

 Interface           Role Sts Cost      Prio.Nbr Type
 ------------------- ---- --- --------- -------- --------------------------------
 Et0/0               Root FWD 100       128.1    Shr
 Et0/1               Altn BLK 100       128.2    Shr
要設定 Static On Mode,請先把其中一隻 Switch 的 Port Shutdown,因為在設定時會造成 Loop。
SW2(config)#interface range ethernet 0/0 - 1
 SW2(config-if-range)#shutdown
然後,兩邊都用 channel-group 1 mode on 把 Port 放進同一個 Group 中,1 這個數字叫做 Channel Group Number,可設定 1-256,兩隻 Switch 的 Channel Group Number 不用相同,不過為方便管理,通常會設一樣。
SW1(config)#interface range ethernet 0/0 - 1
 SW1(config-if-range)#channel-group 1 mode on
 Creating a port-channel interface Port-channel 1

 SW1(config-if-range)#
SW2(config)#interface range ethernet 0/0 - 1
 SW2(config-if-range)#channel-group 1 mode on
 Creating a port-channel interface Port-channel 1

 SW2(config-if-range)#
然後可以 no shutdown 剛才的 Port 了。
SW2(config)#interface range ethernet 0/0 - 1
 SW2(config-if-range)#no shutdown
我們可以在兩隻 switch 分別用 show etherchannel summary 去檢查一下 etherchannel 是否運作中。
SW1#show etherchannel summary
 Flags:  D - down        P - bundled in port-channel
         I - stand-alone s - suspended
         H - Hot-standby (LACP only)
         R - Layer3      S - Layer2
         U - in use      N - not in use, no aggregation
         f - failed to allocate aggregator

         M - not in use, no aggregation due to minimum links not met
         m - not in use, port not aggregated due to minimum links not met
         u - unsuitable for bundling
         d - default port

         w - waiting to be aggregated
 Number of channel-groups in use: 1
 Number of aggregators:           1

 Group  Port-channel  Protocol    Ports
 ------+-------------+-----------+-----------------------------------------------
 1      Po1(SU)          -        Et0/0(P)       Et0/1(P)
在最底的表格中看到此 Switch 只有一個 Group 就是 Group 1,這個 Group 現時有兩個 Port 分別是 Et0/0 和 Et0/1,兩個 Port 的狀態都是 P,即 bundled in port-channel,也就是說兩個 Port 都已經成功被放進 EtherChannel 了,相反如果見到 I (stand-alone) 的話就是失敗了。
我們也可以看看 show spanning-tree,可見 Et0/0 和 Et0/1 只經被隱藏起來,取而代之的是 Po1 (Port Channel 1),由於現時邏輯上只有 1 條 Link 把兩隻 Switch 相連,因此沒有 Port 需要被 Block 去防止 Loop。
SW1#show spanning-tree

 VLAN0001
   Spanning tree enabled protocol ieee
   Root ID    Priority    32769
              Address     aabb.cc00.0100
              This bridge is the root
              Hello Time   2 sec  Max Age 20 sec  Forward Delay 15 sec

   Bridge ID  Priority    32769  (priority 32768 sys-id-ext 1)
              Address     aabb.cc00.0100
              Hello Time   2 sec  Max Age 20 sec  Forward Delay 15 sec
              Aging Time 15

 Interface           Role Sts Cost      Prio.Nbr Type
 ------------------- ---- --- --------- -------- --------------------------------
 Po1                 Desg FWD 56        128.514  Shr
SW2#show spanning-tree

 VLAN0001
   Spanning tree enabled protocol ieee
   Root ID    Priority    32769
              Address     aabb.cc00.0100
              Cost        56
              Port        514 (Port-channel1)
              Hello Time   2 sec  Max Age 20 sec  Forward Delay 15 sec

   Bridge ID  Priority    32769  (priority 32768 sys-id-ext 1)
              Address     aabb.cc00.0200
              Hello Time   2 sec  Max Age 20 sec  Forward Delay 15 sec
              Aging Time 15

 Interface           Role Sts Cost      Prio.Nbr Type
 ------------------- ---- --- --------- -------- --------------------------------
 Po1                 Root FWD 56        128.514  Shr
最後看看 show interface port-channel 1,可見 BW 是 20000 Kbit 了 (兩個 Ethernet Port 的總和)。
SW1#show interfaces port-channel 1
 Port-channel1 is up, line protocol is up (connected)
   Hardware is EtherChannel, address is aabb.cc00.0110 (bia aabb.cc00.0110)
   MTU 1500 bytes, BW 20000 Kbit, DLY 100 usec,
      reliability 255/255, txload 1/255, rxload 1/255
用 Static On Mode 去設定 EtherChannel 非常簡單,卻有一定風險,因為 Static On Mode 是會假設對方也有設 Static On,中間是沒有 Protocol 溝通的。所以如果 Ethernet 的兩端一邊有設 Static On,但另一端沒有設的話,Spanning Tree 混亂造成兩個 Port 都會 Forwarding 產生 Loop。這也是剛才實驗中提到,要先把兩邊 Static On Mode 設好才把 Port no shutdown 的原因。由於有 Loop 的風險,所以還是建議用 PAgP 或 LACP 比較好,因為這些 Protocol 有溝通機制,在不能成 EtherChannel 時可自動返回正常的 STP 運算,避免 Loop 發生。
另外要補充的是,不同的 Port 要成為同一組 EtherChannel,速度、Duplex、STP 設定必需相同,如果是 Multilayer Switch,Layer 2 Port 只可和 Layer 2 Port 成 EtherChannel,同樣道理,Layer 3 只可跟 Layer 3 在一起。如果大家都是 Access Port,VLAN 必需相同,如果是 Trunk Port,Allowed VLAN 必需相同。其實沒什麼需要深究的,總之能設定的東西都要設成一樣就是了!
Port Aggregation Protocol (PAgP)
PAgP 是 Cisco 專有,只能在 Cisco Switch 上設定,PAgP 有兩個模式,分別是 Desirable 與 Auto,兩隻使用 PAgP 的 Switch 就像一對等待對方表白的男女,只要有其中一方開口表白就可以走在一起。願意開口表白的一方叫 Desirable,等待對方表白的一方叫 Auto,所以兩隻 Switch 只要最少有一方是 Desirable 就可成 EtherChannel。因為 Desirable 一方會主動傳送出 PAgP Message,並要求對方回應。但如果雙方也設成 Auto,則雙方都是被動,就不可能成 EtherChannel 了。當 PAgP 成功建立 EtherChannel 後,PAgP Message 會繼續定時傳送去維持 EtherChannel。
| Desirable | Auto | |
|---|---|---|
| Desirable | ✔ | ✔ |
| Auto | ✔ | ✖ |
設定方法亦不難,只要用 channel-group 1 mode desirable 來設 Desirable Mode 和用 channel-group 1 mode auto 來設 Auto Mode 即可。
SW1(config)#interface range ethernet 0/0 - 1
 SW1(config-if-range)#channel-group 1 mode desirable
 Creating a port-channel interface Port-channel 1

 SW1(config-if-range)#
SW2(config)#interface range ethernet 0/0 - 1
 SW2(config-if-range)#channel-group 1 mode auto
 Creating a port-channel interface Port-channel 1

 SW2(config-if-range)#
Link Aggregation Control Protocol (LACP)
至於 LACP 是 IEEE Standard,玩法與 PAgP 大致相同,只不過把兩個 Mode 的名稱由 Desirable 改成 Active 以及由 Auto 改成 Passive。所以,只要最少有一邊是 Active,EtherChannel 就成立。
| Active | Passive | |
|---|---|---|
| Active | ✔ | ✔ |
| Passive | ✔ | ✖ |
SW1(config)#interface range ethernet 0/0 - 1
 SW1(config-if-range)#channel-group 1 mode active
 Creating a port-channel interface Port-channel 1

 SW1(config-if-range)#
SW2(config)#interface range ethernet 0/0 - 1
 SW2(config-if-range)#channel-group 1 mode passive
 Creating a port-channel interface Port-channel 1

 SW2(config-if-range)#
不過 LACP 多了一個叫 Hot Standby 的功能,就是除了 8 個 Port 設成 EtherChannel 之外,還可以最多把 8 個 Port 加進去做 Hot Standby Port。Hot Standby Port 的意思是當有 Active Port 因為某些原因 Down 時,Hot Standby Port 可以即時補上,所以,LACP 最多可以容納 16 port (8 個 Active + 8 個 Hot Standby) 在一個 EtherChannel 之中。至於那個 Port 會被選擇成為 Active 則會按 Port Priority 決定,LACP 會先選 Port Priority 較小的做 Active,如 Port Priority 相同則選 Port ID 較小的。請看以下例子:
假設現時有 16 個 Port 在同一個 EtherChannel,由於所有 Port Priority 預設都是 32768,因此系統選擇 Port ID 最小的 8 個 Port 成為 Active Port,其他則成為 Hot Standby。
SW1#show etherchannel summary
 Flags:  D - down        P - bundled in port-channel
         I - stand-alone s - suspended
         H - Hot-standby (LACP only)
         R - Layer3      S - Layer2
         U - in use      N - not in use, no aggregation
         f - failed to allocate aggregator

         M - not in use, no aggregation due to minimum links not met
         m - not in use, port not aggregated due to minimum links not met
         u - unsuitable for bundling
         d - default port

         w - waiting to be aggregated
 Number of channel-groups in use: 1
 Number of aggregators:           1

 Group  Port-channel  Protocol    Ports
 ------+-------------+-----------+-----------------------------------------------
 1      Po1(SU)         LACP      Et0/0(P)       Et0/1(P)       Et0/2(P)
                                  Et0/3(P)       Et1/0(P)       Et1/1(P)
                                  Et1/2(P)       Et1/3(P)       Et2/0(H)
                                  Et2/1(H)       Et2/2(H)       Et2/3(H)
                                  Et3/0(H)       Et3/1(H)       Et3/2(H)
現在嘗試把一些 Port 的 LACP Port Priority 變小,Active Port 亦隨之改變。留意兩隻 Switch 相對的 Port 的狀態必需相同 (我這邊是 Active Port,對方也應該是 Active Port),否則會造成不相容而出現 Secondary Aggregator 的問題。
SW1(config)#int range ethernet 2/0-1, ethernet 3/2-3
 SW1(config-if-range)#lacp port-priority 1000
 SW1(config-if-range)#end
 SW1#show etherchannel summary
 Flags:  D - down        P - bundled in port-channel
         I - stand-alone s - suspended
         H - Hot-standby (LACP only)
         R - Layer3      S - Layer2
         U - in use      N - not in use, no aggregation
         f - failed to allocate aggregator

         M - not in use, no aggregation due to minimum links not met
         m - not in use, port not aggregated due to minimum links not met
         u - unsuitable for bundling
         d - default port

         w - waiting to be aggregated
 Number of channel-groups in use: 1
 Number of aggregators:           1

 Group  Port-channel  Protocol    Ports
 ------+-------------+-----------+-----------------------------------------------
 1      Po1(SU)         LACP      Et0/0(P)       Et0/1(P)       Et0/2(P)
                                  Et0/3(P)       Et1/0(H)       Et1/1(H)
                                  Et1/2(H)       Et1/3(H)       Et2/0(P)
                                  Et2/1(P)       Et2/2(H)       Et2/3(H)
                                  Et3/0(H)       Et3/1(H)       Et3/2(P)
                                  Et3/3(P)
EtherChannel 與 STP Cost
由於 Bandwidth 的改變,STP Cost 亦會隨之而改變。以下為各 Bandwidth 相對之 STP Cost。
| Speed | STP Cost |
|---|---|
| 10 Mbps | 100 |
| 20 Mbps | 56 |
| 30 Mbps | 47 |
| 40 Mbps | 41 |
| 50 Mbps | 35 |
| 60 Mbps | 33 |
| 70 Mbps | 30 |
| 80 Mbps | 23 |
| 100 Mbps | 19 |
| 200 Mbps | 12 |
| 300 Mbps | 9 |
| 400 Mbps | 8 |
| 500 Mbps | 7 |
| 600 Mbps | 6 |
| 700 Mbps | 5 |
| 800 Mbps | 5 |
| 1 Gbps | 4 |
| 2 Gbps | 3 |
| 10 Gbps | 2 |
| 20 Gbps | 1 |
| 40 Gbps | 1 |
Load Balancing 平衡負載
既然 EtherChannel 裡有多於一個 Port 可以到達目的地,究竟 Switch 會把 Traffic 放上那一個 Port 呢?首先,我們看看怎樣設定 Load Balancing,在 Configuration Mode 用指令 port-channel load-balance <method>。Method 是平衡負載的方法,越高階的型號會提供越多的選項。現在我們先簡單試試 src-ip 這個方法,即是說 Switch 將會跟據 Packet 的 Source IP Address 去選擇用 EtherChannel 的哪一個 Port 把 Packet 送出去。
SW1(config)#port-channel load-balance ?
   dst-ip       Dst IP Addr
   dst-mac      Dst Mac Addr
   src-dst-ip   Src XOR Dst IP Addr
   src-dst-mac  Src XOR Dst Mac Addr
   src-ip       Src IP Addr
   src-mac      Src Mac Addr

 SW1(config)#port-channel load-balance src-ip
根據網上文獻,Switch 會檢查 Packet Source IP 的最後 3 Bits 去計算一個叫 Port ID 值 (這又和我們剛才提到的 Port ID 不同)。請看以下的一些例子:
192.168.1.11 ➡️ 00001011 ➡️ 只取最尾 3 Bits: 011 ➡️ 再變回十進數,Port ID 結果是 3
192.168.1.46 ➡️ 00101110 ➡️ 只取最尾 3 Bits: 110 ➡️ 再變回十進數,Port ID 結果是 6
172.16.20.97 ➡️ 01100001 ➡️ 只取最尾 3 Bits: 001 ➡️ 再變回十進數,Port ID 結果是 1
10.198.45.22 ➡️ 00010110 ➡️ 只取最尾 3 Bits: 110 ➡️ 再變回十進數,Port ID 結果是 6
Port ID 結果會是 0 至 7 其中一個值,那麽,Port ID 是代表那一個 Port 呢?抱歉!Cisco 並沒有告訴我們!😲 不過,最起碼我們可以預計到,Source Address 是 192.168.1.46 和 10.198.45.22 的 Packet 應該會被放到同一個 Port 傳送出去。如果 Load Balance 選用 src-dst-ip 或 src-dst-mac 等有 XOR 的選項的話,請看以下計算例子:
Source IP Address: 192.168.1.30 ➡️ 00011110 ➡️ 只取最尾 3 Bits: 110
Destination IP Address: 192.168.1.68 ➡️ 01000100 ➡️ 只取最尾 3 Bits: 100
然後把結果 XOR: 110 XOR 100 ➡️ 010 ➡️ 再變回十進數,Port ID 結果是 2
Switch 會預先把 Port ID 分配給 EtherChannel 內的 Port,這個分配會盡量公平,例如:EtherChannel 由兩 Port 組成, 就把 Port ID 0, 2, 4, 6 (50%) 分配到第一個 Port,把餘下的 1, 3, 5, 7 (50%) 放在另一個 Port。這樣 Packet 就可以按剛才算到的 Port ID 結果送到正確的 Port 上。然而,公平並非必然,例如:EtherChannel 是由 3 Port 組成,Switch 就唯有把 0, 3, 6 (37.5%) 分配到 Port 1、1, 4, 7 (37.5%) 分配到 Port 2,餘下的 2, 5 (25%) 分配到 Port 3。關於 Traffic 分配請看下表。
| Port 數量 |
Traffic 分配到各 Port 的百分比 | |||||||
|---|---|---|---|---|---|---|---|---|
| 1 | 2 | 3 | 4 | 5 | 6 | 7 | 8 | |
| 1 | 100% | X | X | X | X | X | X | X |
| 2 | 50% | 50% | X | X | X | X | X | X |
| 3 | 37.5% | 37.5% | 25% | X | X | X | X | X |
| 4 | 25% | 25% | 25% | 25% | X | X | X | X |
| 5 | 25% | 25% | 25% | 12.5% | 12.5% | X | X | X |
| 6 | 25% | 25% | 12.5% | 12.5% | 12.5% | 12.5% | X | X |
| 7 | 25% | 12.5% | 12.5% | 12.5% | 12.5% | 12.5% | 12.5% | X |
| 8 | 12.5% | 12.5% | 12.5% | 12.5% | 12.5% | 12.5% | 12.5% | 12.5% |
由此可見,只有由 2, 4 或 8 Port 組成的 EtherChannel 才能把 Traffic 真真正正平均分配到各個 Port 之上,其他組合都會出現 Traffic 不平衡的現象,設計 EtherChannel 的網路時需要留意。
Load Balancing 的技巧
那麽,究竟哪一個 Load Balancing 方法最好呢?這沒有一定答案,要看 EtherChannel 的 Traffic 種類。舉個例子,如果 Traffic 中大部份都是 User 到一台 File Server 下載檔案的話,接近 User 一方的 Switch 使用 dst-ip 是錯誤的,因為 Traffic Flow 全部都是去找同一個 destination IP (File Server),設成 dst-ip 會計算出相同的 Port ID 結果,導致 Traffic 無法平均分配。相反,接近 File Server 一方的 Switch 亦不應使用 src-ip,原因相同。無論如何,網絡管理人應時刻留意 EtherChannel 上的 Traffic 使用量,以免因為 Traffic 分配不均引致 EtherChannel 未能完全發揮效果。
Coming Soon……
Silent Mode and Non-silent Mode
相關主題
Jan Ho 2017-01-01
Posted In: Layer 2 網絡技術
發佈留言