目錄
前言
近來有讀者查詢,因為不明的網絡原因而無法看到一些寄存在外國的網站,手機也無法使用一些通訊軟件,希望筆者介紹如何建立 VPN Server 以解決網絡連接問題。本文會介紹如何使用較為常用的雲端 (Cloud) 方案去建立極低成本的私人 VPN Server。
⛑️ 本文目的只為學術研究,解釋網絡原理及應用方法,並不鼓勵任何犯法行為,敬請留意。⛑️
VPN Server 的原理
所謂 VPN (Virtual Private Network),虛擬私人網絡,泛指一些網絡管道,透過 VPN 加密 (Encryption),保護使用者所傳送的訊息免受竊取或監聽。由於 VPN Server 的架設不受地域限制,電腦或手機甚至可以隱藏自己的真正 IP Address,進一步保護私隱。
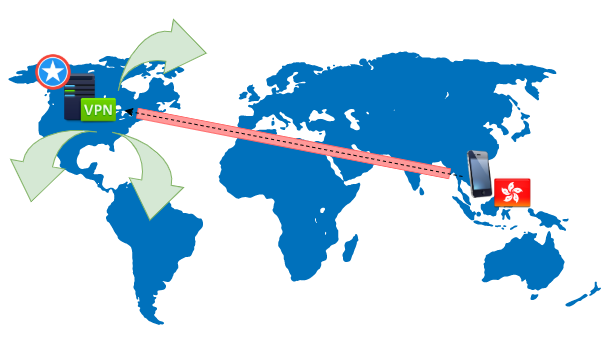
請看以下例子,一台位於香港的手機,透過互聯絡與一台位於美國的 VPN Server 建立 VPN 管道,並以此 VPN Server 作為閘道 (Gateway) 連接互聯絡上的其他伺服器,例如瀏覽網頁或使用通訊軟件,互聯網絡上所有的伺服器就會以為這台手機是來自美國,而不知道其真正地理位置。而且,管道中的訊息經過加密,就算是互聯網供應商也無法看到其內容。
事實上,世界各地有很多 VPN 服務供應商可以提供這種 VPN 服務,然而自設 VPN Server 有以下好處:
- 自設 Server 頻寬高,數據使用量沒有限制,但需按使用量付款。Cloud 的數據價格極為便宜,每 Gb 數據只需約 1 港元,由於 VPN 同時涉及數據輸入及輸出,因此費用將為 2 倍,即約 2 港元 1Gb。
- 一台 Server 可供多台設備及多位使用者同時使用。
- 最重要的是,國外的 VPN Server 可能會因為某些網絡問題而突然無法連接,自設 Server 基本上不會出現這個問題。
第 1 步:啟動 Cloud 上的 VPN Server
我們不會跑到外國去購買和安裝一台 Server,取而代之的是使用網上的 Cloud 服務,例如 AWS (Amazon Web Service) 或者 Google Cloud。意思是租用這些公司設在國外的數據中心裡面的伺服器裡面的一丁點運算能力去跑我們的 VPN Server,本文會用 AWS 在作示範。不過讀者需留意,Cloud 服務供應商一般會按 Server 的運算力 (Computing Power) 收取主機費用,但私人使用的 VPN Server 所需運算力極少,很多時候可以得到免費優惠,例如本文介紹的 AWS,可以整整 1 年不用付款。
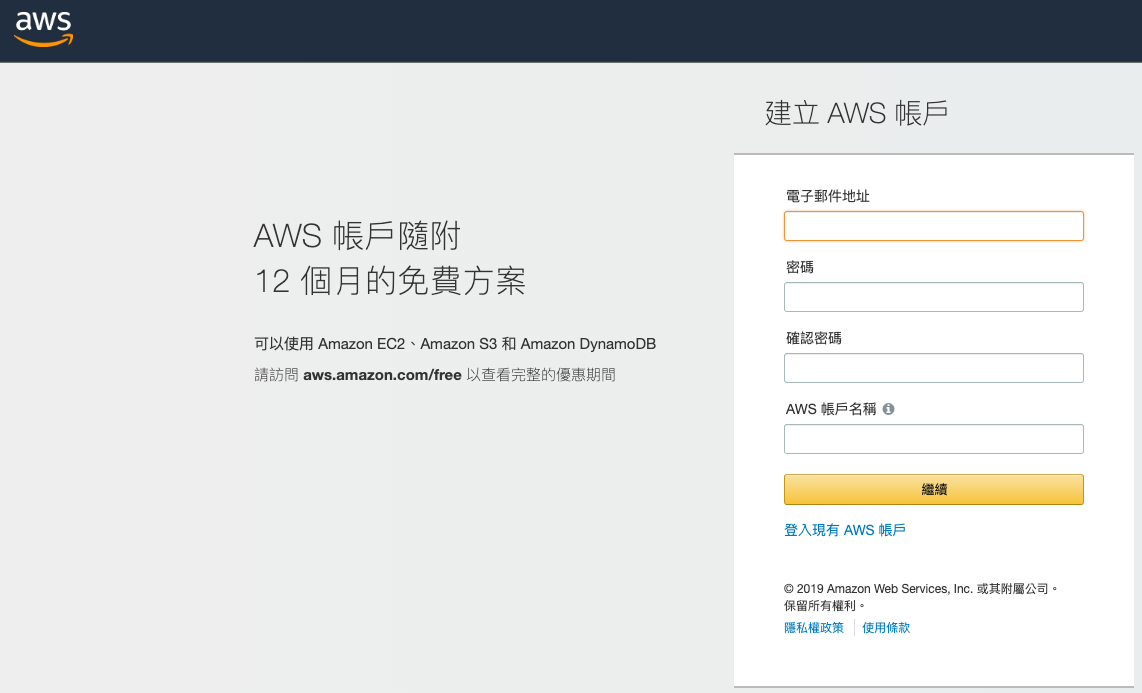
首先到 https://aws.amazon.com/tw/console/ 申請帳號,只是填表格而已,不多說了。
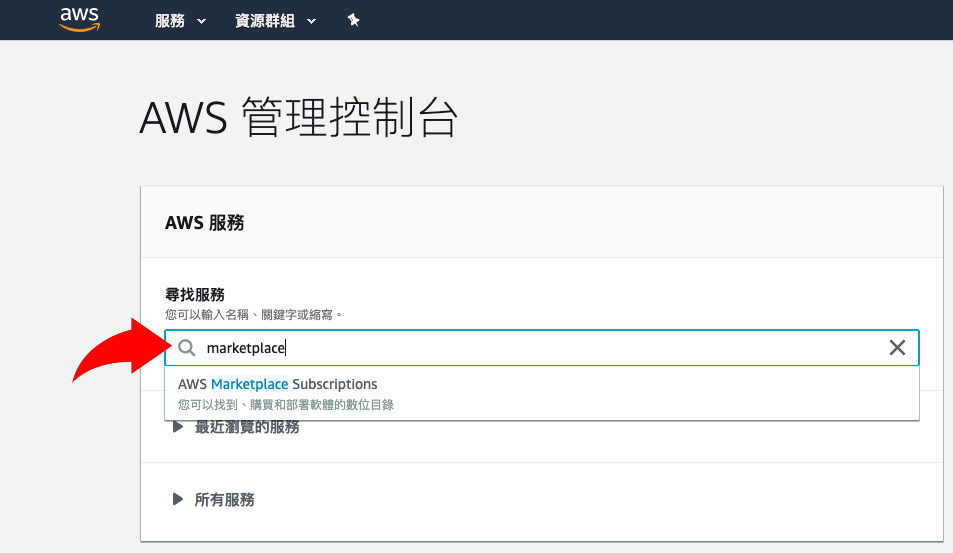
我們想要使用的 VPN Server 名叫 OpenVPN,可以在 AWS 裡的一個叫 Marketplace 地方找到。Marketplace 就是各軟體供應商放於 AWS 給大家使用的 Server。請在「尋找服務」中輸入 Marketplace,便會找到 AWS Marketplace Subscriptions。
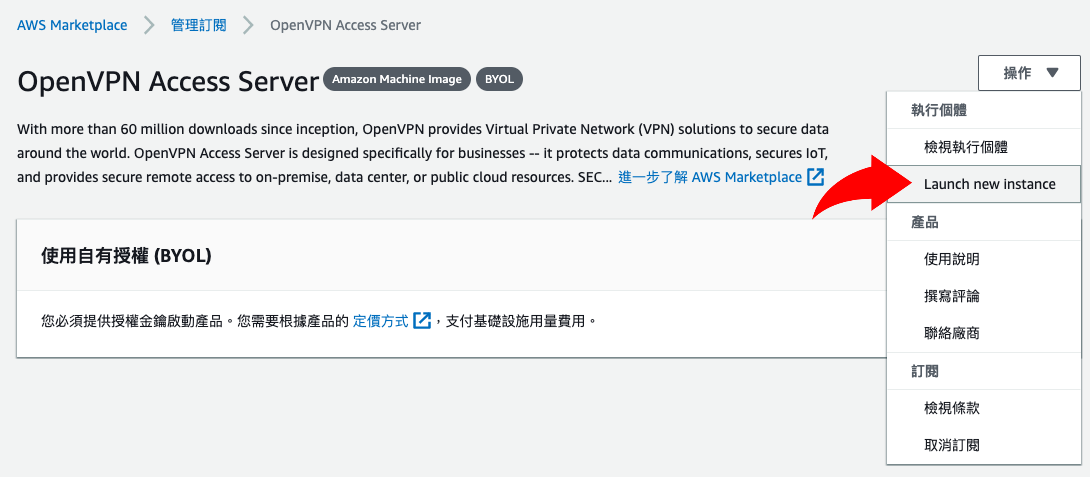
然後搜尋 openvpn,點選 OpenVPN Access Server。

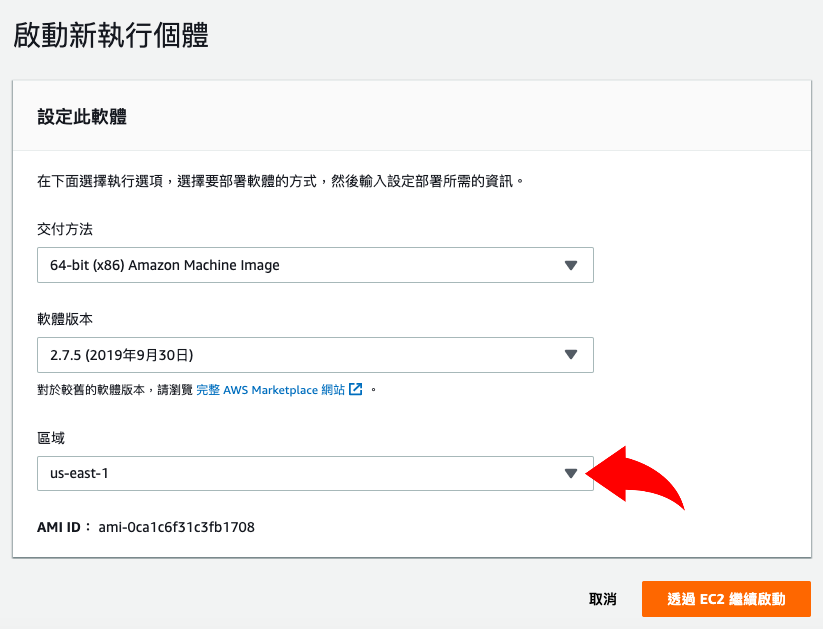
然後按操作,再點選 Launch new instance。
區域請選 us 字頭,即選用位於美國的數據中心,其他不用更改,然後點透過 EC2 繼續啟動。
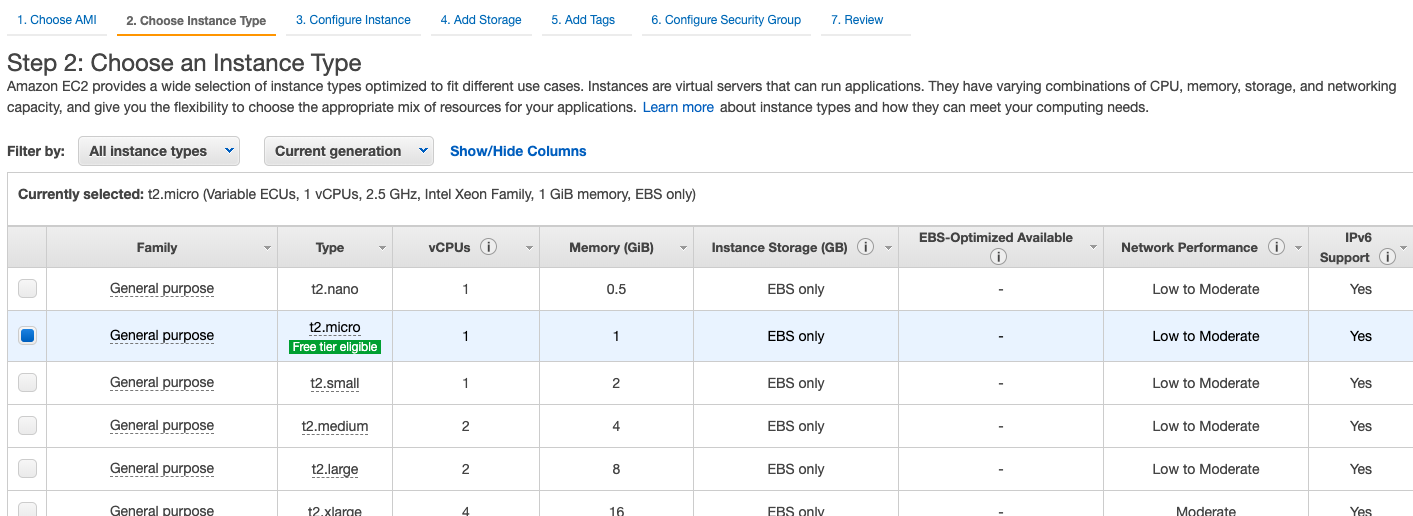
然後是選擇 Server 的運算能力,運算能力越強則收費越貴。由於現在要設置的 VPN Server 只供私人使用,理論上選最平價的便可以了。幸運地,AWS 正在推出 12 個月免費試用,選 t2.micro 便可得到此優惠,實乃窮人之選!🤑 完成後點選 Review and Launch。
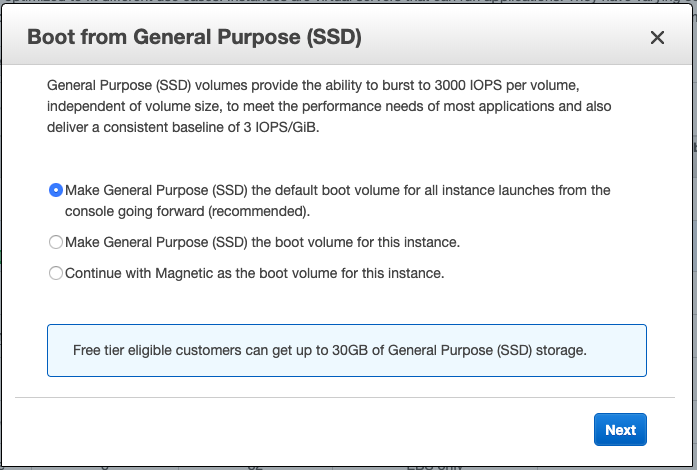
再送 30G 硬碟空間,照單全收便可。
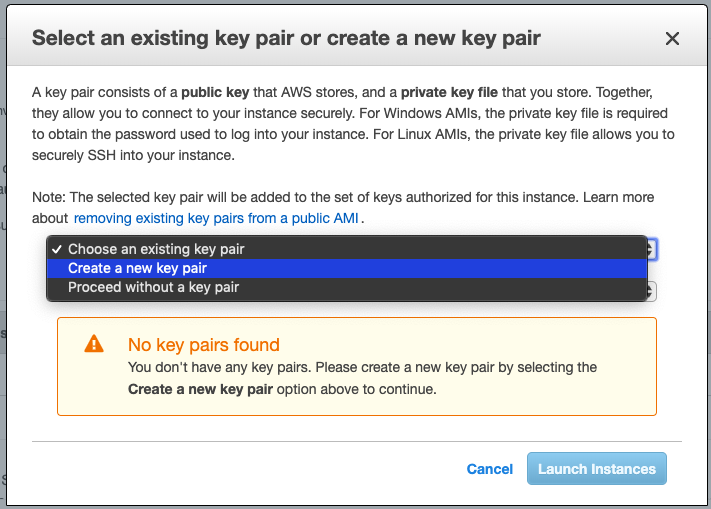
由於第一次使用 AWS,需要產生 Key Pair 在稍後登入 Server 時使用。然後按 Download Key Pair 把 Key 儲存在電腦內。最後,按 Launch Instances 完成設定。
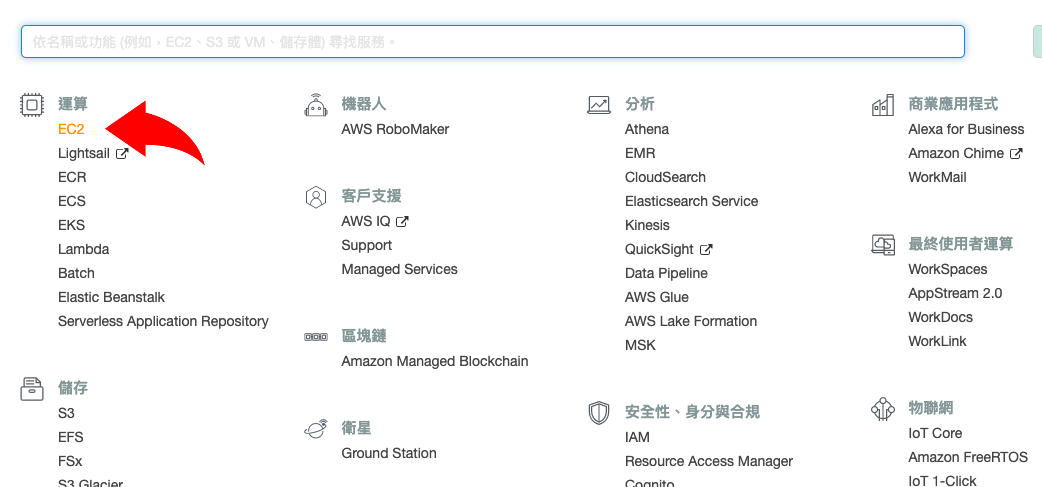
回到服務版面選 EC2。
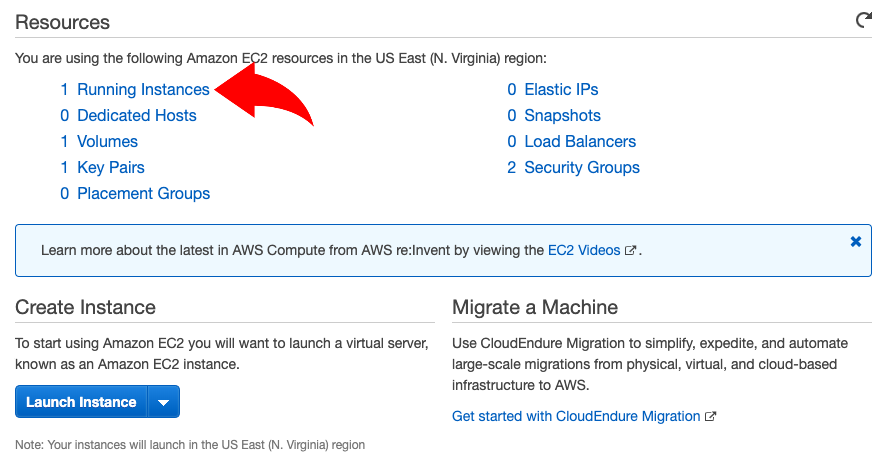
再選 Running Instances。
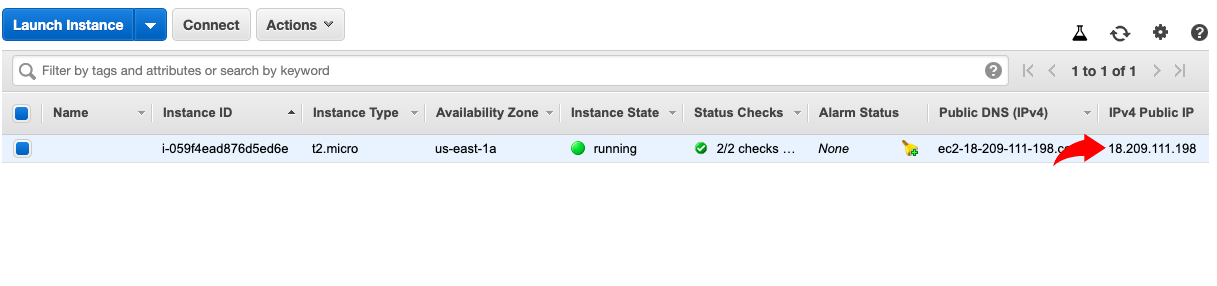
看到 Server 已經預備好了,留意 IPv4 Public IP 這一欄就是這台 VPN Server 的 IP 了。
第 2 步:用 Key 登入 VPN Server
剛才所產生的 Key 是用來登入 Server 的,為了保安,Cloud 供應商的 Server 通常會使用 Key 來登入。假設讀者使用 MacOS,先打開終端機,到剛才下載 Key 的 Folder 執行以下指令把 Key 的屬性改為唯讀。Windows 用家則請按這裡查看連接方法。
MacBook:~ Jan$ cd Downloads/
MacBook:Downloads Jan$ chmod 400 key.pem
然後便可使用以下指令利用 Key 登入 Server,IP 就是剛才看到在 Cloud 上的 Server 的 IP。
MacBook:Downloads Jan$ ssh -i "key.pem" openvpnas@18.209.111.198
The authenticity of host '18.209.111.198 (18.209.111.198)' can't be established.
ECDSA key fingerprint is SHA256:WbAO2tdMP+cbXpPJ5K1EEEcgSYk+m3WXtQSC6XfzUXs.
Are you sure you want to continue connecting (yes/no)? yes
如果成功的話,你會看到一大推 License 訊息,答 yes 便可以了。
Welcome to OpenVPN Access Server Appliance 2.7.5

  System information as of Wed Oct  9 11:33:47 UTC 2019

  System load:  0.0               Processes:           90
  Usage of /:   29.5% of 7.69GB   Users logged in:     0
  Memory usage: 22%               IP address for eth0: 172.31.40.237
  Swap usage:   0%


          OpenVPN Access Server
          Initial Configuration Tool
------------------------------------------------------
OpenVPN Access Server End User License Agreement (OpenVPN-AS EULA)

    1. Copyright Notice: OpenVPN Access Server License;
       Copyright (c) 2009-2019 OpenVPN Inc. All rights reserved.
       "OpenVPN" is a trademark of OpenVPN Inc.
    2. Redistribution of OpenVPN Access Server binary forms and related documents,
       are permitted provided that redistributions of OpenVPN Access Server binary
       forms and related documents reproduce the above copyright notice as well as
       a complete copy of this EULA.

<--Output Omitted-->

   11. Purchasing a license key does not entitle you to any special rights or
       privileges, except the ones explicitly outlined in this user agreement.
       Unless otherwise arranged prior to your purchase with OpenVPN,
       Inc., software maintenance costs and terms are subject to change after your
       initial purchase without notice. In case of price decreases or special
       promotions, OpenVPN Inc. will not retrospectively apply
       credits or price adjustments toward any licenses that have already been
       issued. Furthermore, no discounts will be given for license maintenance
       renewals unless this is specified in your contract with OpenVPN Inc.

Please enter 'yes' to indicate your agreement [no]: yes
第 3 步:設定 VPN Server
第一次登入 Server,需要進行初期設定,只要答幾個問題便可完成設定,請看以下解說。
Once you provide a few initial configuration settings, OpenVPN Access Server can be configured by accessing its Admin Web UI using your Web browser. Will this be the primary Access Server node? (enter 'no' to configure as a backup or standby node) > Press ENTER for default [yes]: yes 兩台 OpenVPN 可以進行 HA (High Availability) 運作,第一台是 Primary (Active),第二台是 Secondary (Standby),如果這是讀者第一台建立的 VPN Server 選 yes 便對了。 Please specify the network interface and IP address to be used by the Admin Web UI: (1) all interfaces: 0.0.0.0 (2) eth0: 172.31.40.237 Please enter the option number from the list above (1-2). > Press Enter for default [1]: 1 用那組 Interface 作為 Admin Interface 的 IP,初心者選 (1) 便可。 Please specify the port number for the Admin Web UI. > Press ENTER for default [943]: 943 如無特別考慮,用預設值便可。 Please specify the TCP port number for the OpenVPN Daemon > Press ENTER for default [443]: 443 如無特別考慮,用預設值便可。 Should client traffic be routed by default through the VPN? > Press ENTER for default [no]: yes 重要:用戶的 Traffic 是否要路由至 VPN Tunnel 之中,當然要,這樣才可利用 VPN Server 作為 Gatewy 連接互聯網。 Should client DNS traffic be routed by default through the VPN? > Press ENTER for default [no]: yes 重要:用戶的 DNS Traffic 是否要路由至 VPN Tunnel 之中,也是需要的。 Use local authentication via internal DB? > Press ENTER for default [yes]: yes 初心者選 yes 便可。 Private subnets detected: ['172.31.0.0/16'] Should private subnets be accessible to clients by default? > Press ENTER for EC2 default [yes]: yes 初心者選 yes 便可。 Private subnets detected: ['172.31.0.0/16'] Should private subnets be accessible to clients by default? > Press ENTER for EC2 default [yes]: yes 初心者選 yes 便可。 To initially login to the Admin Web UI, you must use a username and password that successfully authenticates you with the host UNIX system (you can later modify the settings so that RADIUS or LDAP is used for authentication instead). You can login to the Admin Web UI as "openvpn" or specify a different user account to use for this purpose. Do you wish to login to the Admin UI as "openvpn"? > Press ENTER for default [yes]: yes 建立 openvpn 作為管理者帳號。 > Please specify your OpenVPN-AS license key (or leave blank to specify later): 免費版本已支援 2 台裝置連接 VPN,按 ENTER 跳過便可。 Initializing OpenVPN... Removing Cluster Admin user login... userdel "admin_c" Adding new user login... useradd -s /sbin/nologin "openvpn" Writing as configuration file... Perform sa init... Wiping any previous userdb... Creating default profile... Modifying default profile... Adding new user to userdb... Modifying new user as superuser in userdb... Getting hostname... Hostname: 18.209.111.198 Preparing web certificates... Getting web user account... Adding web group account... Adding web group... Adjusting license directory ownership... Initializing confdb... Generating init scripts... Generating PAM config... Generating init scripts auto command... Starting openvpnas... NOTE: Your system clock must be correct for OpenVPN Access Server to perform correctly. Please ensure that your time and date are correct on this system. Initial Configuration Complete! You can now continue configuring OpenVPN Access Server by directing your Web browser to this URL: https://18.209.111.198:943/admin Login as "openvpn" with the same password used to authenticate to this UNIX host. During normal operation, OpenVPN AS can be accessed via these URLs: Admin UI: https://18.209.111.198:943/admin Client UI: https://18.209.111.198:943/ See the Release Notes for this release at:Access Server Release Notes
最後還要幫 openvpn 這個帳號設定密碼。
openvpnas@openvpnas2:~$ sudo passwd openvpn
Enter new UNIX password:
Retype new UNIX password:
passwd: password updated successfully
第 4 步:建立使用者帳號
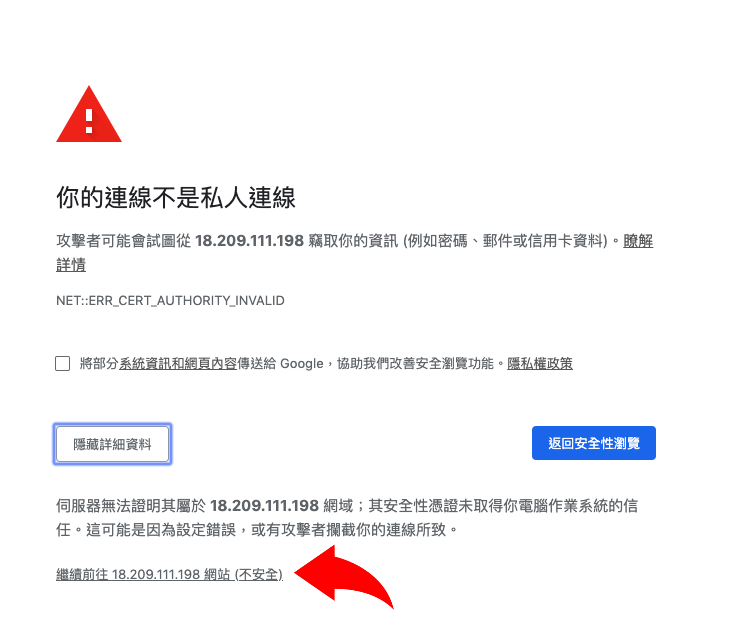
現在可以在瀏覽器輸入 https://<伺服器 IP>:<伺服器 Port>/admin 登入 VPN Server 的界面,以本文建立的 Server 為例,輪入 https://18.209.111.198:943/admin 。看到警告訊息是正常的,因 Server 沒有正式的 SSL 簽章, 按進階然後點選「繼續前往」便可以了。
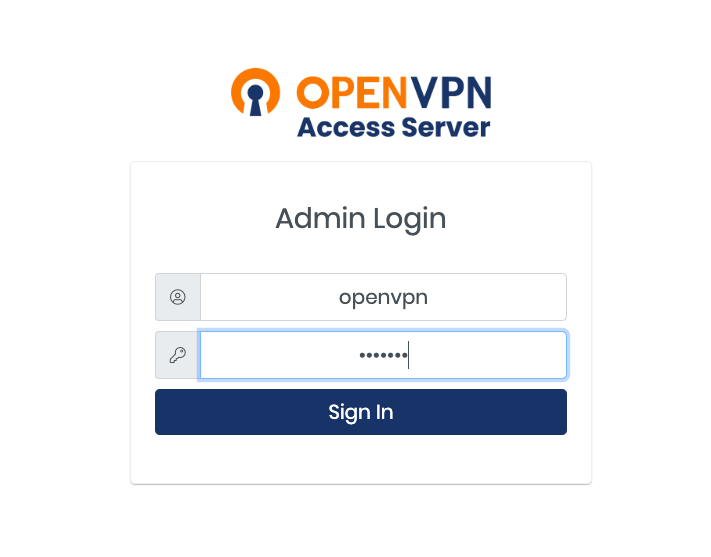
來到登入畫面,輸入剛才設定的管理員帳號 (openvpn) 和密碼。看到 License 畫面按 Agree 便可。
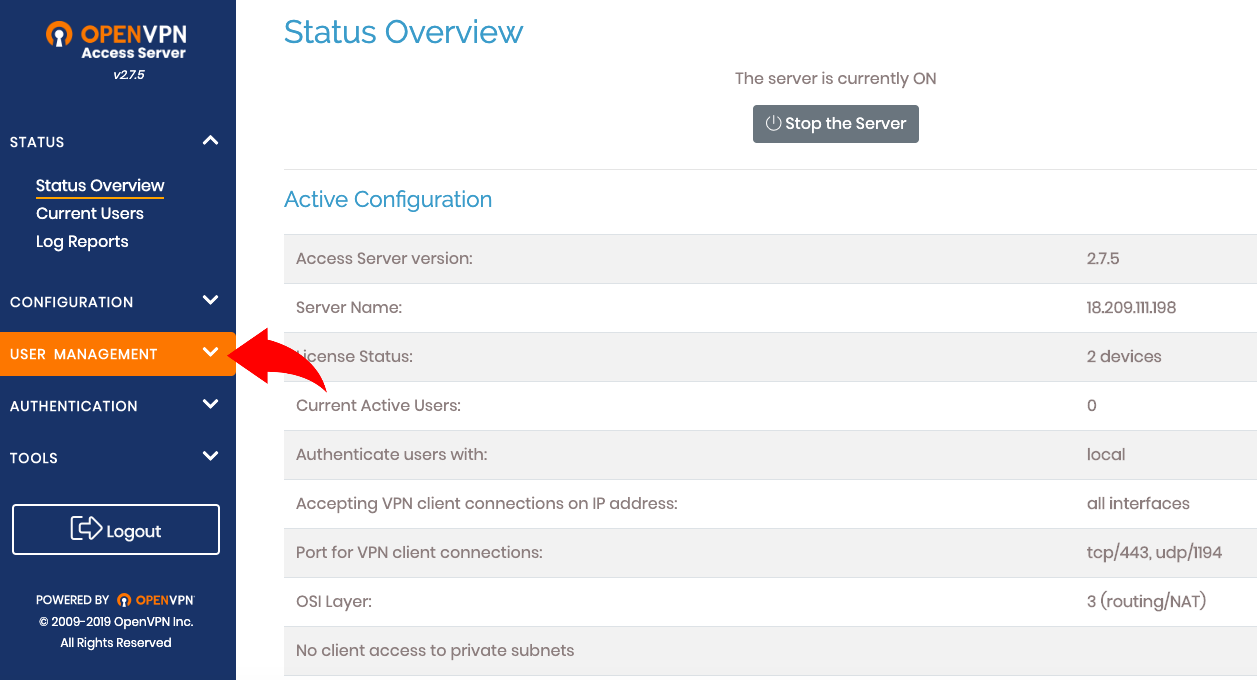
看到 VPN Server 已經在運作中,基本上沒有什麽設定要改,現在只需要為用戶 (User) 創建帳號,用戶帳號是給手機或電腦用作連接 VPN 之用,請在選單點選 User Management。
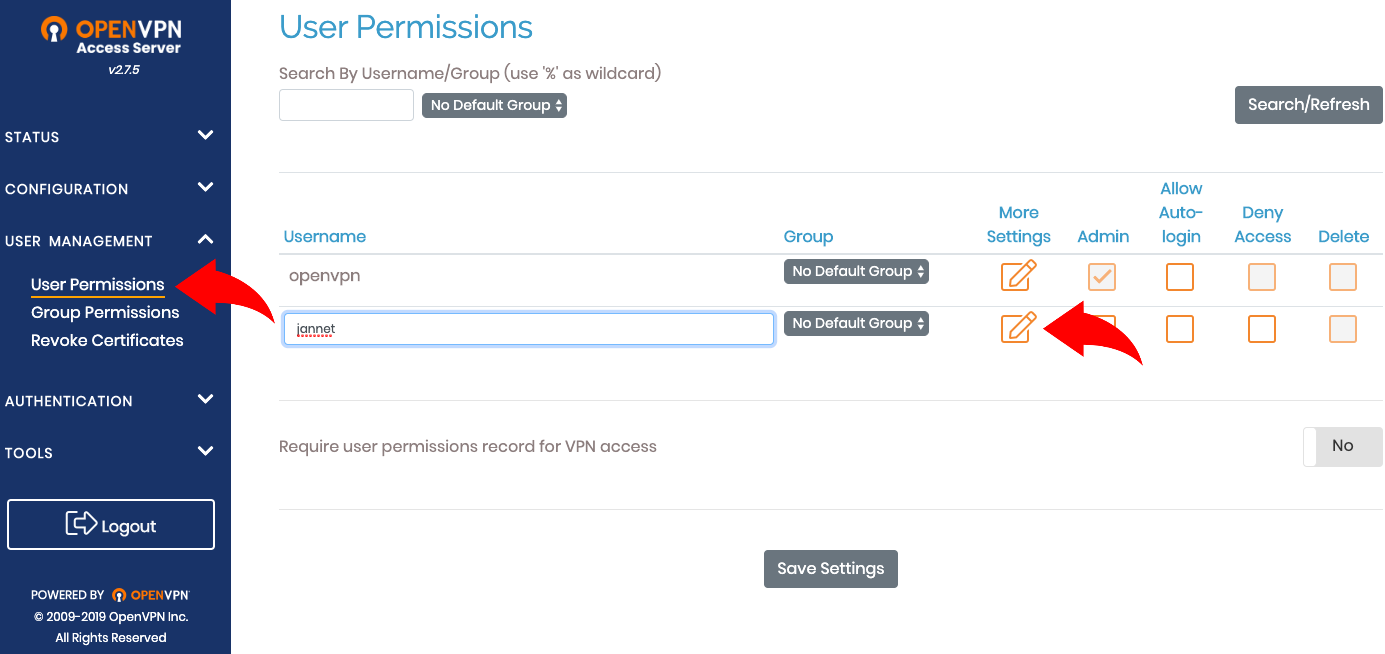
再選 User Permissions,在 new username 輸入帳號名稱,然後按 More Setting 那個鉛筆圖案。
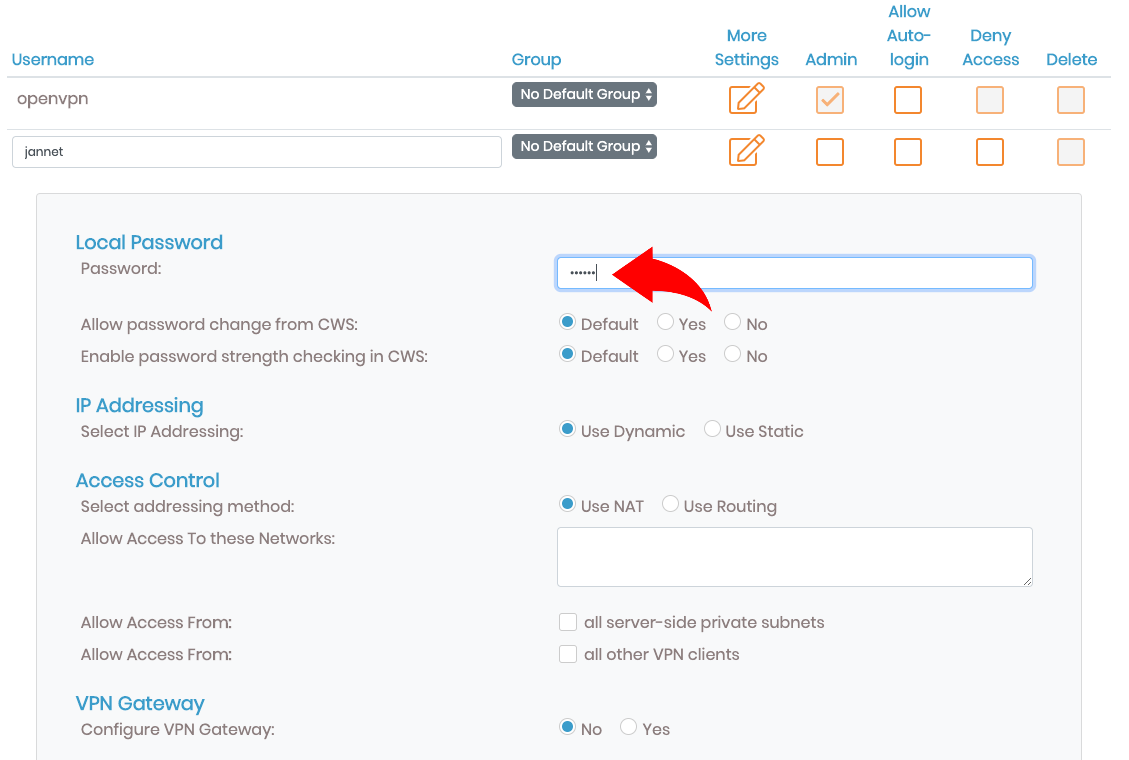
設密碼後拉到最底按 Save Setting 便完成了。
最後按 Update Running Server 更新設定。

第 5 步:在手機安裝 OpenVPN App
現在可以在手機安裝一個名為 OpenVPN 的 App,安裝後打開 App,選 Access Server 進行設定。

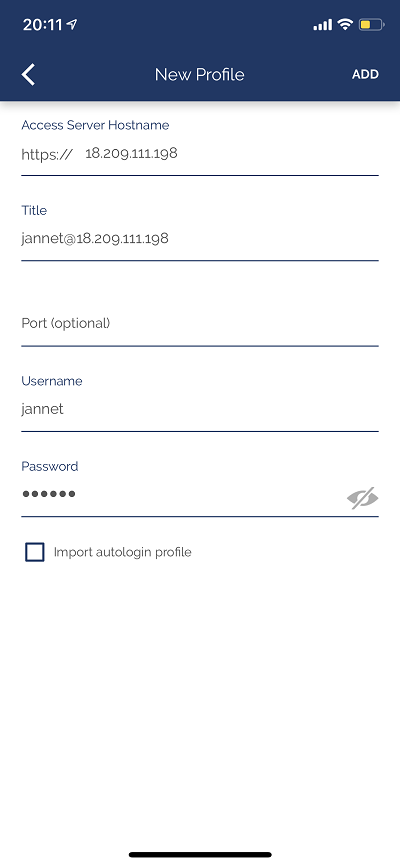
依次填入相關的設定,Access Server Hostname 填寫 Server 的 IP Address,Title 會被自動填寫,Port 漏空便可以了,最後填寫用戶的 Username 和 Password,填好後按右上角的 ADD 按鈕。
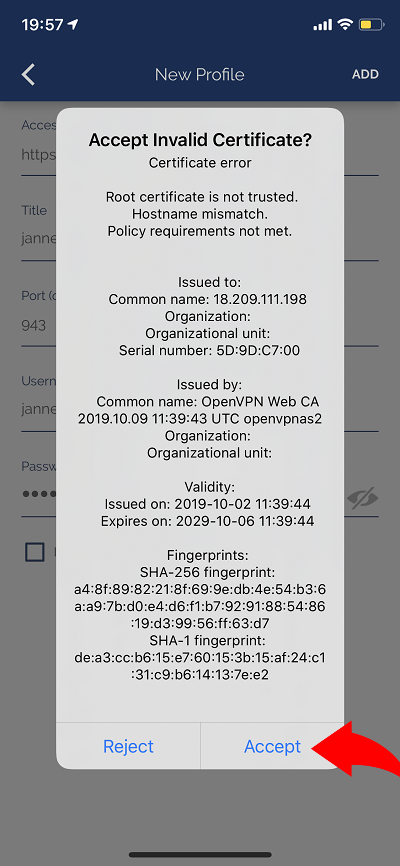
出現這個畫面時按 Accept 便可。
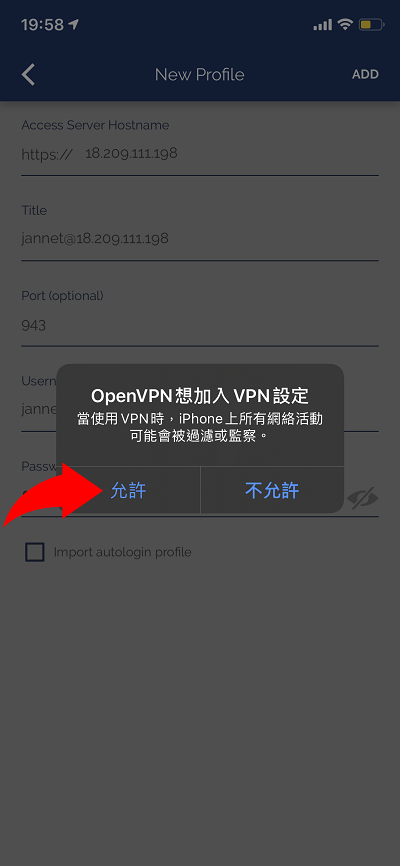
然後按允許,容許手機加入這個 VPN 設定。
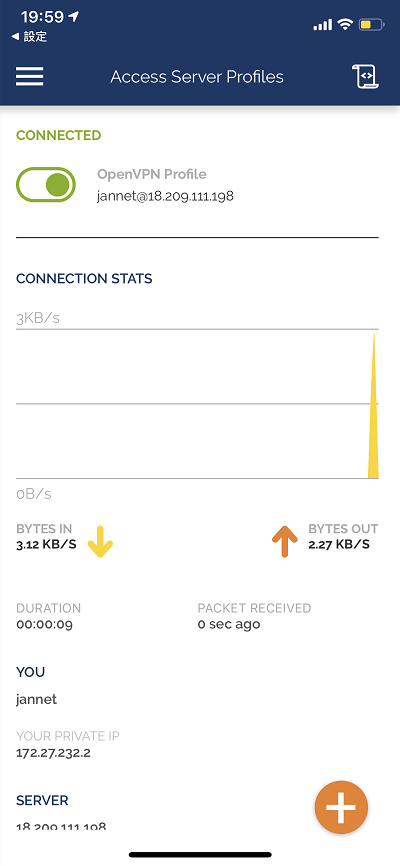
現在可以連接自己的 VPN server 了!
第 6 步:測試
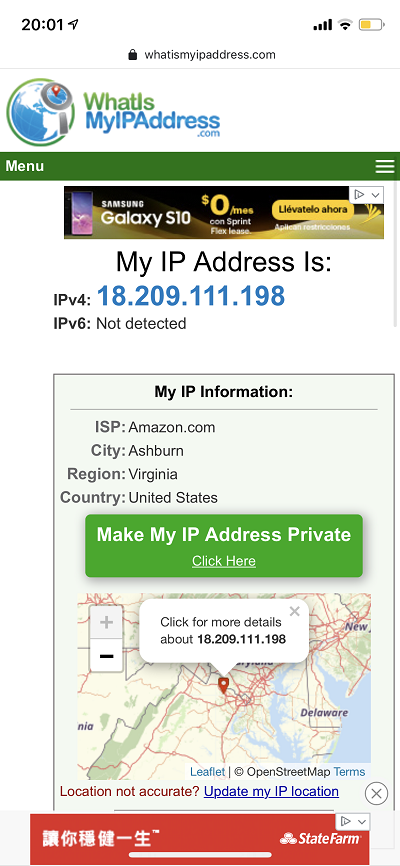
現在進行測試,到 查詢我的 IP 工具 查看一下,發現手機正在使用 VPN Server 的 IP Address 連接互聯網,位置在美國維珍尼亞州。
利用通訊事務管理局 (OFCA) 的 APP 測試一下,速度算是十分不錯了,只是網絡延時慢一點,這是正常的結果,畢竟訊息在地球上跑了一圈再來到手機。
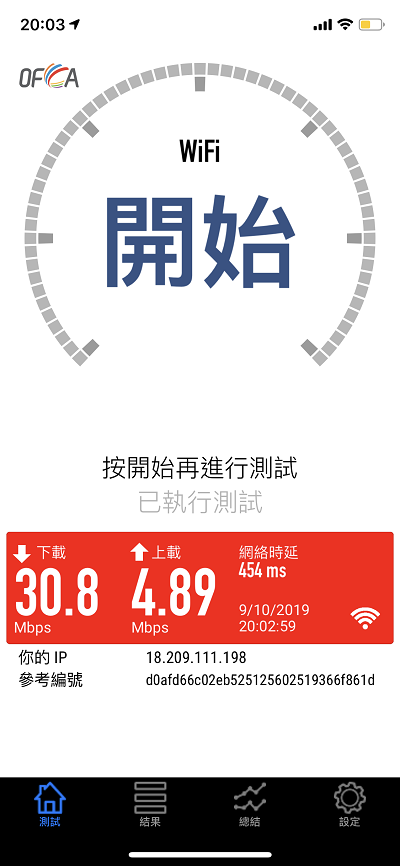
由於啟動 VPN 後所有手機的訊息都使用 VPN Tunnel 來傳送,而剛才說過 AWS 會按數據使用量收費,如不需要使用 VPN 時可把 VPN 關掉,雖然收費極便宜,但小數怕長計。
進階設定
PC 上安裝 OpenVPN
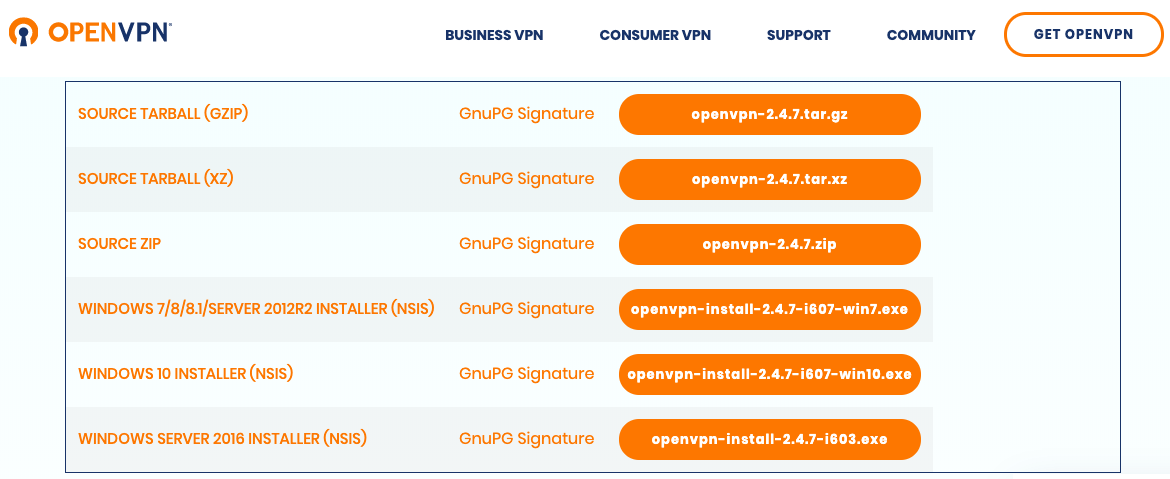
除了手機之外,不同的操作系統 (如 Windows,MacOS,Linux) 都可安裝 OpenVPN,讓電腦也能透過 VPN 連接 Internet,可到 openvpn.net 網站下載安裝檔。
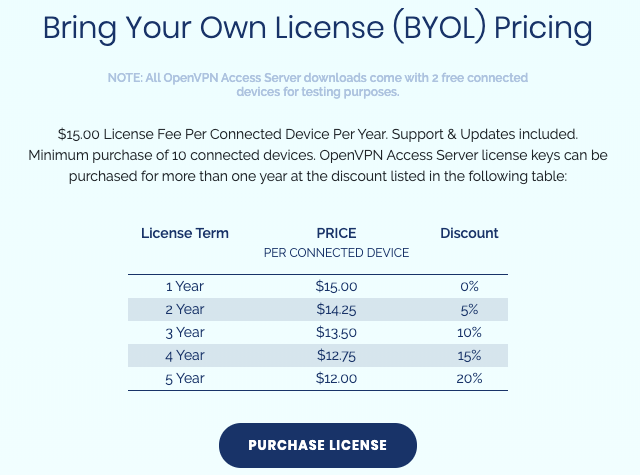
購買 License
OpenVPN Server 免費版本只可同時容許 2 個裝置連接,如要增加則需另外購買 License,但需留意多人使用的話 VPN Server 運算力可能需要提高。
固定 IP
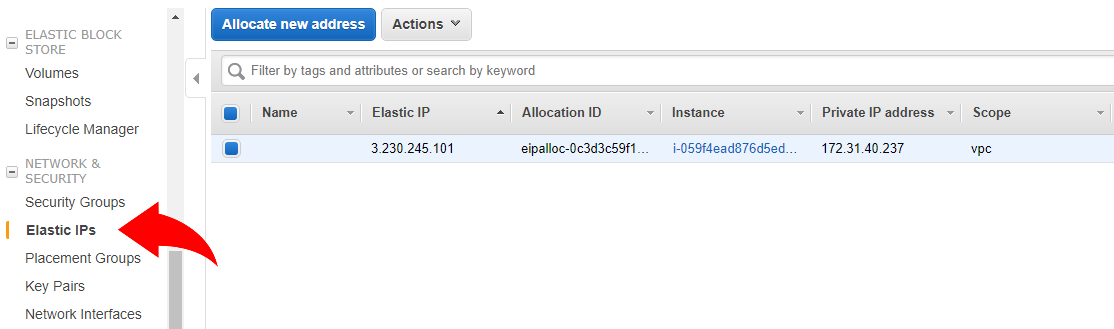
AWS 預設沒有固定 IP,即 Server 關機後重開會獲派不同的 IP,手機便要重新設定了。建議為 VPN Server 設固定 IP,詳情可在 AWS 選單中按 Elastic IPs 瞭解一下。
更改 Port
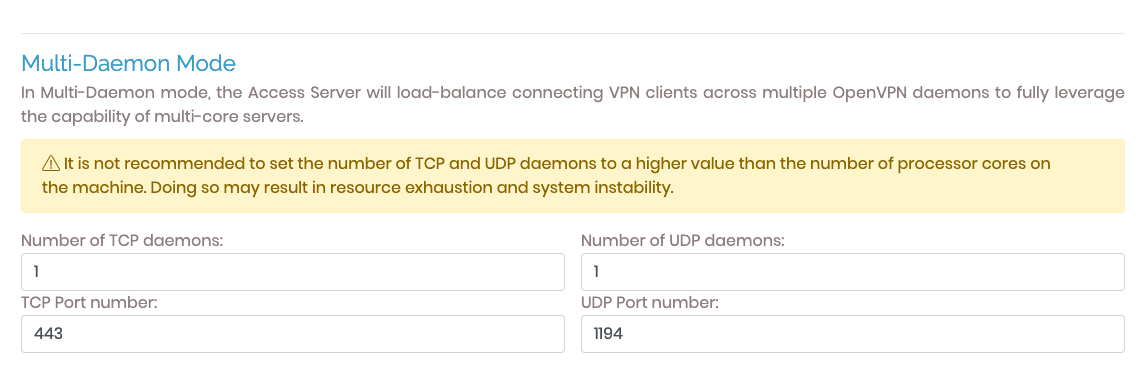
OpenVPN 預設使用 TCP 443 Port 及 UDP 1194 Port 作為連接埠,這也是 VPN Server 的預設連接埠。可是在地球上某些國度裡,會特別注意這些連接埠,因此,如有需要的話,可把這預設設定稍作更改。要更改的地方有 2 個,首先在 OpenVPN Server 中點選 Configuration,然後是 Network Settings,更改 TCP Port nuber 和 UDP Port number。
然後在 AWS 中的 Security Groups 更改 inbound rules。

相關主題
Jan Ho 2019-06-01
Posted In: 其他技術 Others
發佈留言